This time I will show you how to install, deploy and Test an application remotely on JBoss EAP 6.2, few steps should be done:
So first connect to the remote server using FileZilla. You can put directly your installed JBoss on the remote server or install a new one. Here I will not copy my working one, but I will take the second choice.
So I download the JBoss EAP 6 jar and transfer it to the server.

Then using Putty connect also the server (using an admin account).
Once connected execute these commandes:
java -version
At least you need the version 1.6 of Java.
mvn --version
At leat you need version 3.0
unzip jboss-eap.6.x.x.jar
JBoss will be then installed. So next run it. To do so go to jboss-eap.6.x/bin folder then execute ./standalone.sh. Your server should run without error.
In order to access the console, you need to create a client accout. So using putty and being in the bin folder, execute the command ./addUser.sh. Then follow the instructions (I used the managementRealm). This account will be used in the console.
Don't forget also to configure the Standalone.xml with your DataSource and especially give the address where you dataBase is running (my dataBase is running on the same server).
To fix that, we need to make some changes in the "jboss-eap-6.2/standalone/configuration/standalone.xml" where I change the IP addresses from 127.0.0.1 to 0.0.0.0. Like this, JBoss will accept remote call to the Console and to the Web Services.
In order to make it easy to edit remote files, configure FileZilla to edit your files using your favorite program. So in FileZilla go to Edit->Settings and choose you program.

Then:
 Come back to Standalone.xml, it should look like this:
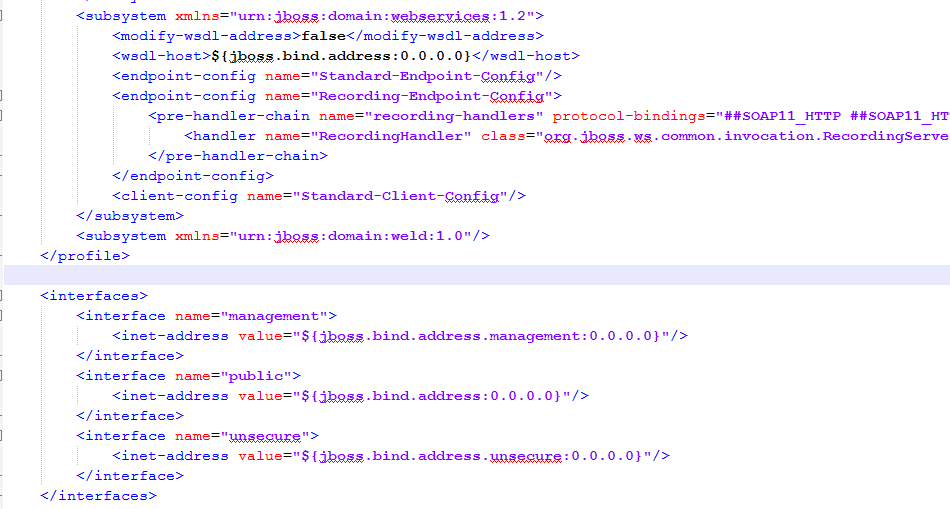 So all the addresses are 0.0.0.0.
Before deploying the application, you should first generate the war. This cone be done using ant, or using eclipse. So right clic on the project, and Export.

Choose where to save this war locally.

Once added, clic on En/Disable in order to enable it and deploy it on the server.


Step1: Install JBoss on the remote server.
In order to do that, you need FileZilla and Putty (to execute commands).So first connect to the remote server using FileZilla. You can put directly your installed JBoss on the remote server or install a new one. Here I will not copy my working one, but I will take the second choice.
So I download the JBoss EAP 6 jar and transfer it to the server.
Then using Putty connect also the server (using an admin account).
Once connected execute these commandes:
java -version
At least you need the version 1.6 of Java.
mvn --version
At leat you need version 3.0
unzip jboss-eap.6.x.x.jar
JBoss will be then installed. So next run it. To do so go to jboss-eap.6.x/bin folder then execute ./standalone.sh. Your server should run without error.
In order to access the console, you need to create a client accout. So using putty and being in the bin folder, execute the command ./addUser.sh. Then follow the instructions (I used the managementRealm). This account will be used in the console.
Step2: Configure you JBoss.
Now, if you have added some modules to your server like jdbc, or dataSource definition don't forget to add them. So using FileZilla, you can add the new module. For me it was "C:\jboss-eap-6.2\modules\system\layers\base\org\postgresql".Don't forget also to configure the Standalone.xml with your DataSource and especially give the address where you dataBase is running (my dataBase is running on the same server).
Step3: Configure Remote access to the Console and Web Services.
By default, JBoss can be accessed only locally using the address 127.0.0.1. So I wasn't able to access the console neither the webservices (once the application deployed, coming below).To fix that, we need to make some changes in the "jboss-eap-6.2/standalone/configuration/standalone.xml" where I change the IP addresses from 127.0.0.1 to 0.0.0.0. Like this, JBoss will accept remote call to the Console and to the Web Services.
In order to make it easy to edit remote files, configure FileZilla to edit your files using your favorite program. So in FileZilla go to Edit->Settings and choose you program.
Then:
Step4: Generate the war.
Before deploying the application, you should first generate the war. This cone be done using ant, or using eclipse. So right clic on the project, and Export.
Choose where to save this war locally.
Step5: Deploy the application
It is time to deploy the application. In order to do that (using the console). So use the adress (put your server address instead of "remoteServerAddress"):
http://remoteServerAddress:9990/console.
Once connected, go to ManageDeployment section. You need to specify your war location.
Once added, clic on En/Disable in order to enable it and deploy it on the server.
Now you application is ready to be tested.
Step6: Test the application
As my application is a Web service, I need only the address of the WSDL wich I will put in SoapUI. So clic on the deployed war -> webservices and you will have details about the WSDL...
Just create a new project in SoapUI and specify the address of the WSDL.
That's all for today, I hope really that it helped you :)


No comments :
Post a Comment