Today we will work on the creation of a web project with these properties:
- Server JBoss eap6.2
- Database Postgres 9.2
- Relational mapping : Use of Hibernate 4
- Spring 4
- Maven
Once my database is designed, comes the choice of the ORM. I have chosen the JPA specification with Hibernate implementation.
Step1: create a dynamic web project
Convert the project to Maven project. Then use the same steps to convert it to JPA project.
Select the version of JPA and Java.
Be sure that Hibernate (JPA 2.1) is selected.
After downloading Spring tools in eclipse, you can add Spring nature to the project:
Step 2: Configure the JBoss EAP 6.2 server
Now we will add a server on which our application will run. So let's use the JBoss EAP 6.2
If you don't have an environment runtime, you can configure it by specifying the your server directory
Make
sure that you are specifying the right JDK
I have also downloaded JBoss eap 6.2 repository as I am using Maven.
I am using JBoss which comes with Hibernate, JPA..., so I will use these modules as JBoss load them implicitly.
My initial pom.xml looks like this
Step3: Datasource Configuration
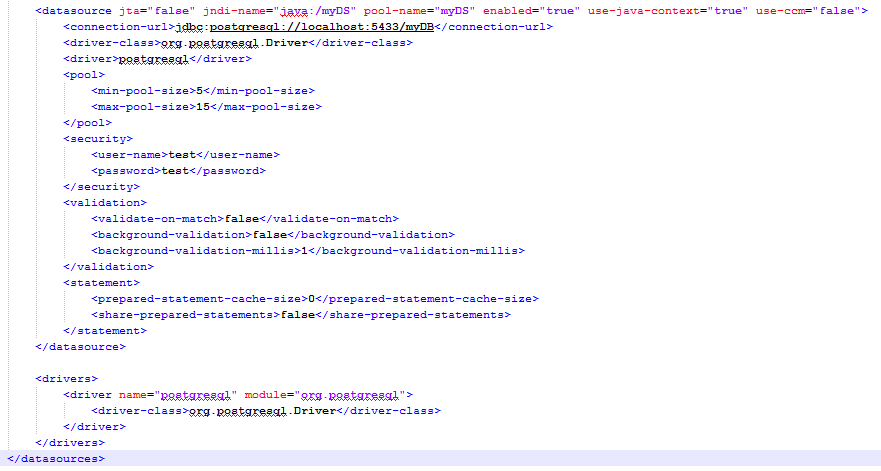
Now that the server is created, we will configure the datasource. This is no more done in separate file *-ds.xml as in previous versions of JBOss. It is done in the C:\EAP-6.2.0\jboss-eap-6.2\standalone\configuration\standalone.xml file.
You should add the JDBC Dirver (for me it is postgresql-9.2-1004.jdbc4.jar) in JBoss modules. So create this folder hierarchy: org\postgresql\main inside JBoss modules folder: C:\EAP-6.2.0\jboss-eap-6.2\modules\system\layers\base\. Copy then your driver and create module.xml
Step4: Setting the persistence.xml
Now we will configure the persistence.xml setting file located under src/META-INF folder
JPA implementations allow the developer to chose between a JTA or RESOURCE_LOCAL transaction management.
The Java Transaction API (JEE APi ) enables distributed transactions to be done across multiple resources in Java. JBoss server supports JTA transactions.
RESOURCE_LOCAL is using basic JDBC level transactions, thus it is not possible to span a transaction among multiple persistence unit.
Once created, use Window-> Open perspective -> Others -> Hibernate. If every think is weel done, you can see table in your DB
Step 5: Fix the connection with the Database.
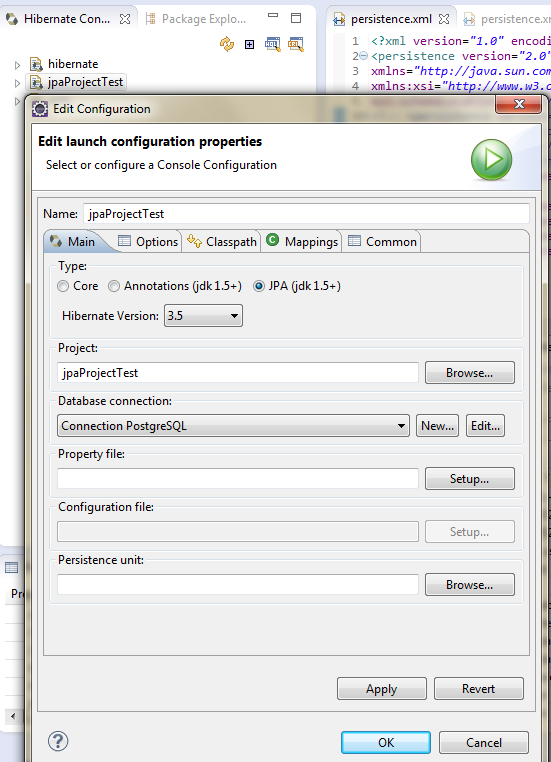
Now go to window -> Perspective -> Hibernate. The defined datasource will be there. Double clic on it. I have and error:
"org.Hibernate.console.HibernateConsoleRuntimeException: Could not create JPA based Configuration"
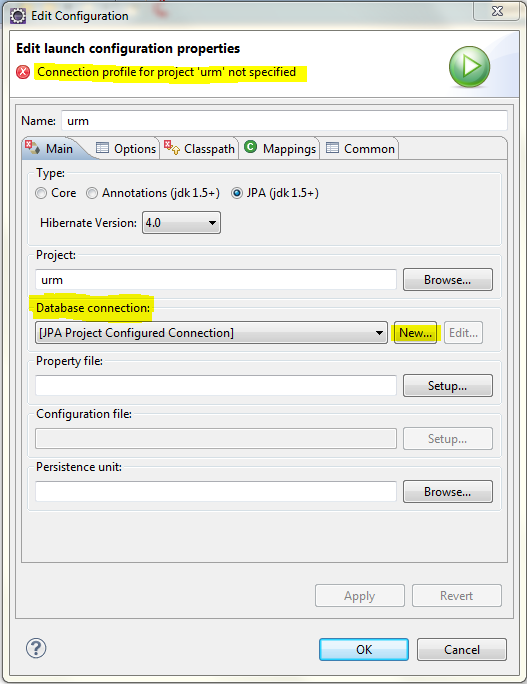
In fact I think I should configure the connection by specifying my Driver ... So rigth clic on the configuration and edit it.
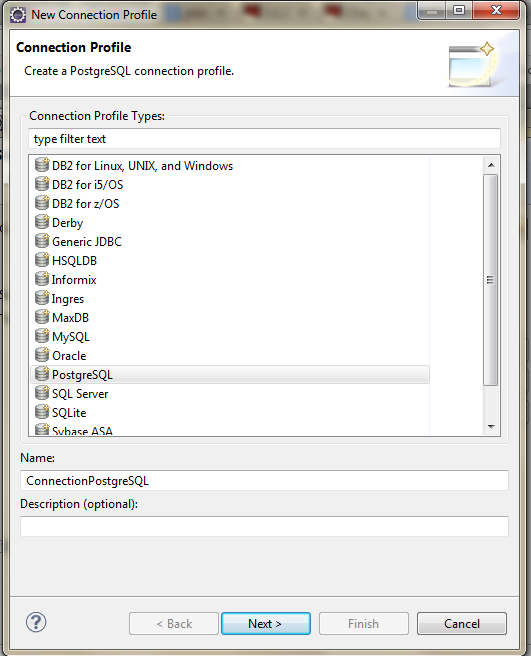
We should specify the driver. By default eclipse comes with version 8. As my database is 9.2, I should remove that driver and add postgres9.2.
Specify the Driver location. Make sure then that the properties are well specified.
After adding the driver, properties, press OK. You can then validate the connection.
It seems that there is a problem in eclipse with JPA project and Hibernate tools. So we cannot visulaize our tables.
EDIT:
See this link to Resolve this Classpath problem and generate tables.
Don't worry, I have found the solution ;) Great.
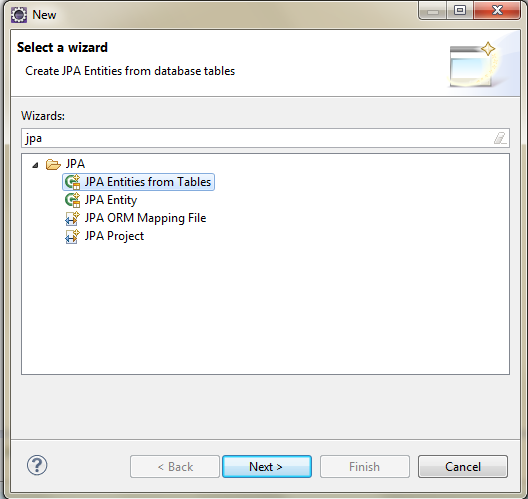
Ok so now in order to generate tables.
Once the tables selected, you can go ehead in the creation and entities will be ready for use.
Soon I will finish this tutorial with spring config....
Step 5: Spring
So first thing to do is to add maven dependency to spring-orm. Next create the spring configuration file, applicationContext.xml.
Once the name specified, you can chose the XSD namespaces which will be used and their versions.
According to the Spring 4 documentation "Using the LocalContainerEntityManagerFactoryBean" is the most powerful JPA setup option, allowing for flexible local configuration within the application. In fact, using org.springframework.orm.jpa.LocalEntityManagerFactoryBean, developer isn't able to refer to an existing JDBC Datasource bean definition neither support global transactions.
so finally, my ApplicationContext.xml is:


